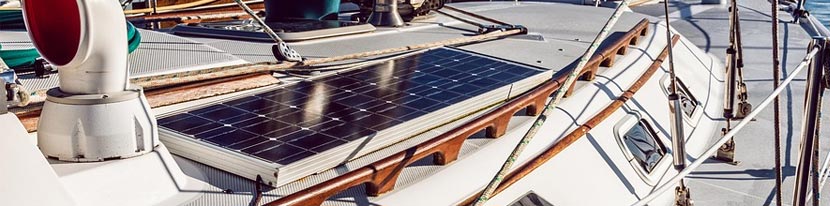
Technological advances related to solar panels make them almost essential on a boat nowadays, whether it is to maintain the charge of the batteries during absences without connecting the boat to the dock (which is more and more often prohibited by harbor authorities due to the risks of fire) or to spread the ever-increasing consumption on board.
Here are some tips to choose the right installation diagram and connect your solar panels to your circuit.
Connect the charge controller
In humid environments such as a boat, it is recommended to use pre-tinned cables for best performance over time. These are recognized by their silver colored wires instead of the copper colored.
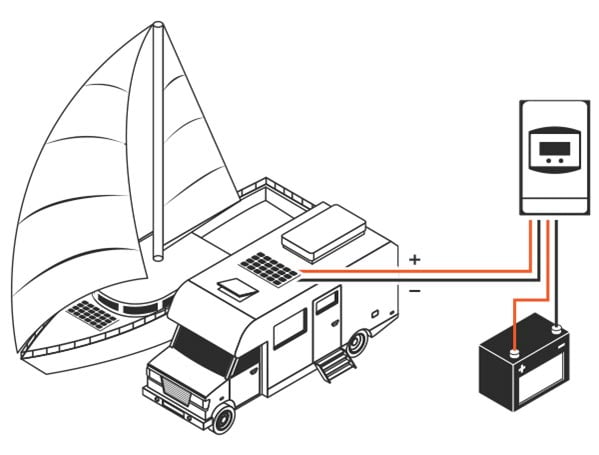
First of all, connect the regulator to the house battery as shown above. In doing so, a regulator with auto detection will recognize the battery system. Then connect the solar panel. In almost all cases, you will need to use a long cable and a connection between this cable and the cable of the solar panel has to be made.
If you have a removable solar panel, you will most likely have MC4 waterproof connectors on it and you should use MC4 connectors that are compatible with them on the end of the cable from the regulator. The metallic part of the MC4 connector should be welded to the wire, then put inside the plastic part with a click. You should then screw on the cap firmly to achieve a complete seal. Pressing instead of welding could cause a defective connection and at worst catch fire due to the heat.
For Flush panels that do not have connectors, you must connect the cable on the inside. Welding is better than any other method of connection.
If possible, choose thick cables (large cross-sectional area) to avoid any losses. A small percentage of the loss is acceptable for the cable running from the solar panel to the regulator. Between the regulator and the battery, we want the voltage to drop to zero. Therefore, it is important to place the regulator as close as possible to the batteries or to the main cables.

Solar panels in parallel or in series ?
Connection in series :
Advantages :
. Higher tension
Disadvantages :
. Small constant power loss in the bypass diode. Bypass diodes will avoid partial shade phenomenon but 2 panels in series will always produce less than 2 panels in parallel.
. Limitation of the number of panels according to the specifications of the MPPT
Connection in parallel :
Advantages :
. No partial shade phenomenon, especially on a boat
. Better overall performance
. No bypass diode
Disadvantages :
. Not all MPPTs allow parallel connection
. Panels must have identical specifications

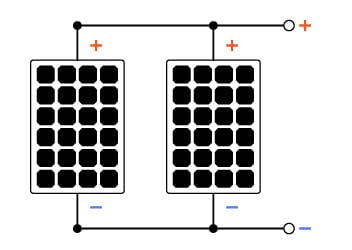
Solar panels connected in parallel
Use models with similar Vmp (indication on the technical sheet).
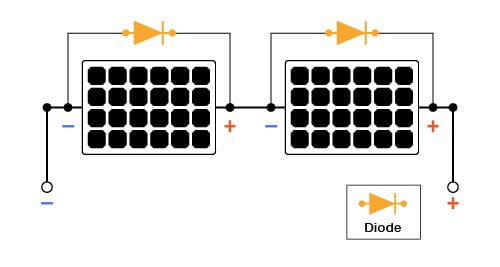
Solar panels connected in series
If connecting the solar panels in series is unavoidable, we recommend using a maximum of 2 to 3 panels, respecting the maximum voltage of the panels and of the MPPT.
Bypass diodes (see below) are ALWAYS required to prevent that the less well-exposed panel lowers the overall production
For 24V or 48V systems, we recommend using a Genasun Boost controller in order to avoid connecting solar panels in series.
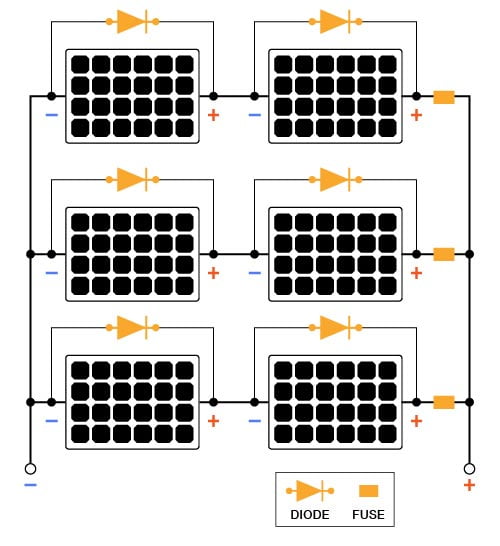
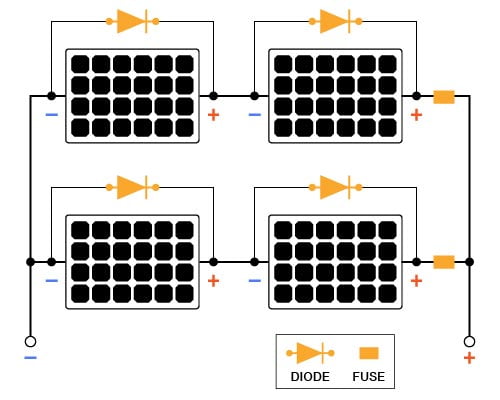
Parallel and series combination
For large panels, a combination of series and parallel connection is necessary in order to find the right combination of voltage and panel specifications.
Some recommendations :
- The maximum number of panels that can be connected in series varies depending on the model.
- The number of parallel groups is limited by the MPPT.
- The same advantages and disadvantages described previously concerning connections in parallel vs in series apply here as well.
- Use a balanced symmetrical configuration.
- The same size and model of solar panel should be used.
- A bypass diode must be installed on each panel.
For each series group, a fuse is mandatory. The amperage of the fuse is determined by the ISC (Max short-circuit current found in the technical sheets of the panels) X 1.25.
Example: for a panel with an ISC of 6 A, you should use a fuse of 1.25 X 6 = 7.5 or 8 A
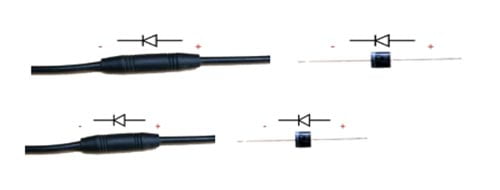
The direction of the diodes
The direction of the diodes is crucial, it is indicated by arrows or a + and – sign; The + of the diode should be plugged into the – of the panels.
Multiple installations
In order to meet large production needs, it is possible to associate several subsystems with an MPPT on each of them
On a boat for example: a combination of panels connected in series and in parallel for starboard and another for port. tribord et un autre pour bâbord.